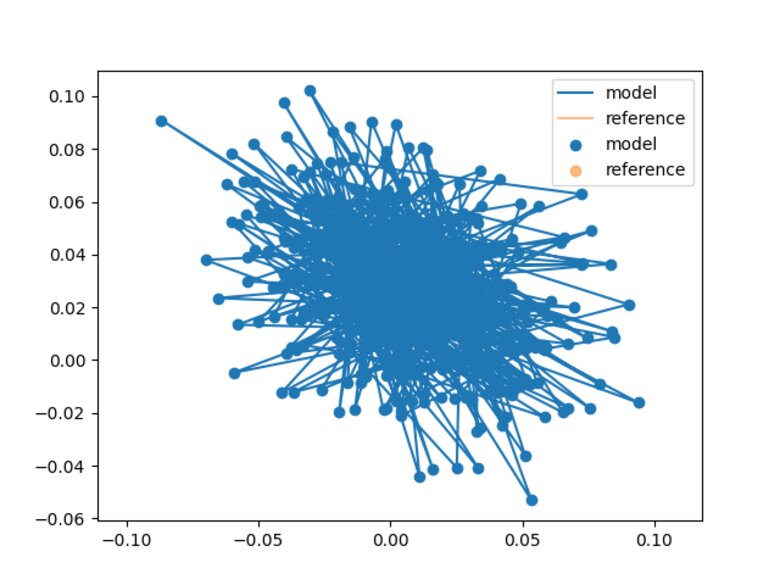
I figured out how to run SentenceTransformer models local-only without network (I think)
Tools for thought - Ship's Log 4 Building
Notes on embeddings, features I've landed and what's next
Why Sports Metrics? Building
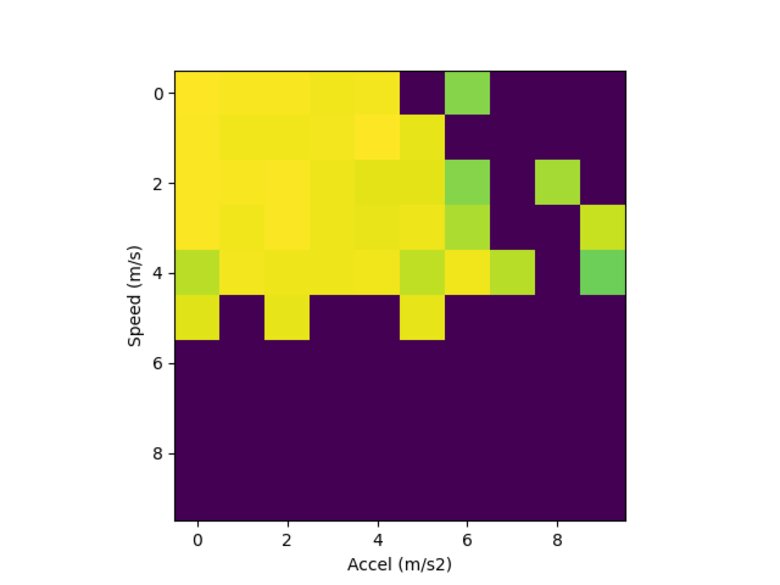
I've been tracking my training and ultimate frisbee games for some time now, and I recently decided to turn the tracked data into metrics to quantify my running performance. The initial motivation stems from watching a lot (a lot!) more Premier League soccer and starting to learn more about how high level soccer teams track their players to quantify statistics. Some metrics are out of my league, but some are much more attainable. For example, I can implement metrics such as: Total Distance covered, Sprint Distance, ...
Out Of Memory VectorDB Building
Last I left off, I had way more content that I wanted to embed and search relative to what my laptop could keep in memory, leaving me with no interactive tooling. Where to go from there? Let's start with sqlite-vec
Tools for thought - Ship's Log 3 Breaking
Building on the learnings from last time, I'm working on improving the download experience. The previous experience was somewhat limited when trying to incorporate new sources. Unfortunately, this efficient downloading has also turned the vector database into something too big to keep in memory on my laptop, so I need to seek out other options for continued use.
Imagery Synthesis for Drone Celestial Navigation Simulation, A Review Building
Research notes for exploring celestial navigation
Tools for thought - Ship's Log 2 Building
Building on the learnings from last time, I'm working on speedups to significantly reduce the time to launch the interactive features to make them more, well, interactive. Previously, the script was taking 800 seconds! on startup and that has been improved significantly.
Celestial Navigation, starting with drones Building
Research notes for exploring celestial navigation
Tools for thought - Ship's Log 1 Building
I started with exploring celestial navigation as an initial use case for the tools for thought. My primary takeaways were that the database creation speed really limits the interactive nature of the tool and that the user interface could be improved.
Tools for thought and discovery Building
I've always been interested in increasing the number of research papers that I read and using that to speed up how quickly I can learn different knowledge areas. The problem I have is that I'm aware of large sources of papers (e.g. Mastodon, arXiv.org, and toward my specific interests, the robotics and software engineering topics within arXiv), but don't know what I don't know about content that I'm missing. Where I'd like to end up is that I can be working on writing a topic and in parallel tools can be working to help me surface references that can either be immediately cited or extend my learning on the topic in a tight loop with my writing.
Research Areas for 2025 Building
I'm focusing on starting 2025 by getting more actively connected to research in a variety of fields for the year.
Design Driven Design Building

Design Driven Design builds feedback loops that allow for continuous improvements to open source projects during each pull request. The loops are: Design Writing informs Feature Testing which in turn informs the Design, Feature Testing informs Unit Testing which in turn informs the Feature Testing, Unit Testing informs Design Writing which in turn informs the Unit Testing. These loops form seams for collaboration across partners or for self-re-evaluation at mindful points in the process to maximize success.
Superoptimization - New FormaK Experiment Building
A new experiment for FormaK has landed: Superoptimization. Instead of individual peephole optimization, the experiment prototypes using search and a model of the CPU to find the optimal ordering of all operations.
Hyperparameter Selection - New FormaK Feature Building
A new feature for FormaK has landed: Hyperparameter selection. Automatically select optimal parameters based on data from the modeled system.
Repairing a Sweatshirt Pocket - A Visual History Building
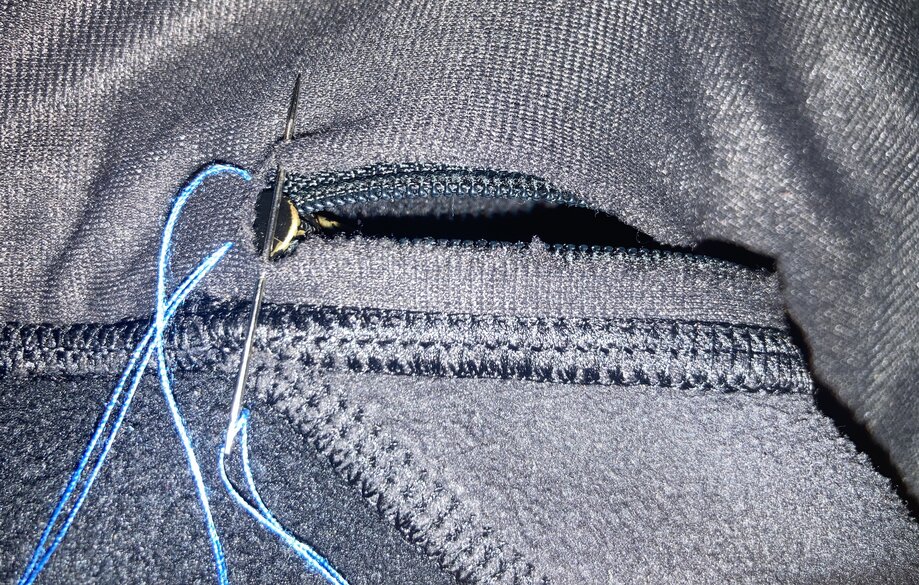
I have a sweatshirt that ripped a pocket. It's quite comfy, but I don't wear it much because I always worry about losing something in the pockets. Today I decided to sew up the pocket. I also considered patching it but the whole was small enough that it didn't need a patch.
FormaK Tooling: Documentation Building
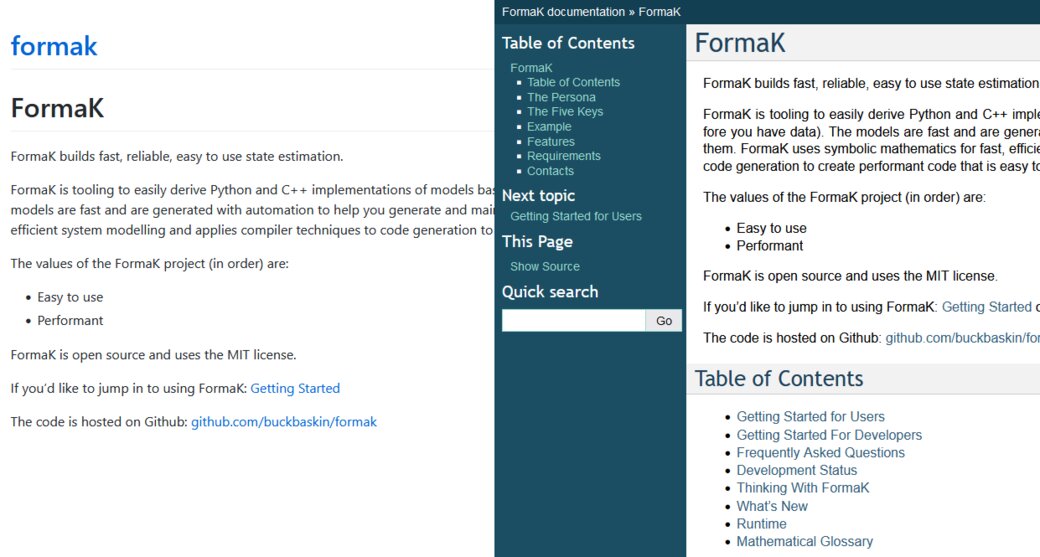
FormaK implements a new documentation builder to make documentation much easier to navigate and look better too.
Repairing a Torn Backpack Strap By Hand - A Visual History Building
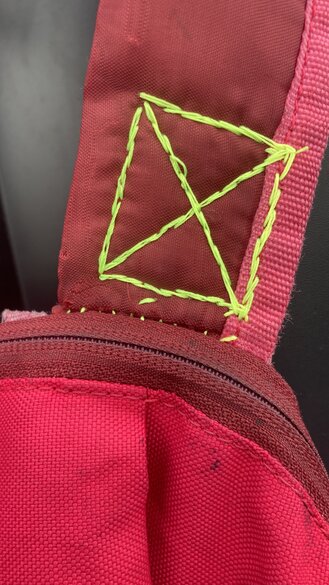
I have a small backpack that I love and have used for many years. Unfortunately, the backpack strap began to tear away at the shoulder, leaving me with an ever more tenuous hold on the contents. As a "new year, new me" project, I decided to fix the strap.
The Simplify Speedup Experiment Building

Over multiple iterations of improving FormaK (reference IMU model rocket model, the original Python code generation), I've wanted to leverage the power of Sympy to provide efficient implementations of symbolic concepts before converting to Python or C++. The tool for this job is
simplify. With one call, it can simplify polynomials, simplify trigonometry and other approaches. Combine this with Common Subexpression Elimination and we have a powerful pair of tools to write efficient code regardless of the model. There's just one problem: Sympy can be incredibly sluggish for some functions. Each call can take 10s of seconds. These 10s of seconds can stack up to minutes of time spent waiting and hoping for a result. For this experiment, I take some time to dive into what's going on and try to understand why it can be so darn slow sometimes.Behind the Scenes of the Strapdown IMU Reference Model Building
A new feature for FormaK has landed: the Strapdown IMU Reference model. The model is now available for inclusion into new models and use as a reference for implementing future models. This post covers some of the aspects of the design and development that didn't make it into the final design and feature.
Strapdown IMU Reference Model - New FormaK Feature Building
A new feature for FormaK has landed: the Strapdown IMU Reference model. The model is now available for inclusion into new models and use as a reference for implementing future models.
Innovation Filtering - New FormaK Feature Building
A new feature for FormaK has landed: Innovation filtering. Automatically make Kalman Filters more robust.
FormaK Runtime - New FormaK Feature Building
A new feature for FormaK has landed: The FormaK runtime. The first tool in the runtime is a Managed Filter that handles coordinating process and sensor updates.
AST Code Generation - New FormaK Feature Building
A new feature for FormaK has landed: improved model generation by leveraging a subset of the C++ Abstract Syntax Tree
Mast V1.1 Released Building

Launch day is here! Presenting Mast, an open source, privacy first recommender and discovery tool for Mastodon
Mast V1.0 Released Building
Launch day is here! Presenting Mast, an open source, privacy first recommender and discovery tool for Mastodon
Calibration - New FormaK Feature Building
A new feature for FormaK has landed: generating models with calibrated sensors
Back to Breaking: 3D Printing Edition - Part 2 Breaking
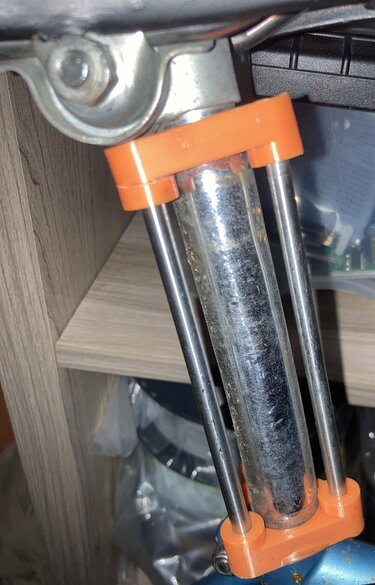
On the topic of broken parts, the 3D printed seat support that I'd made has also failed.
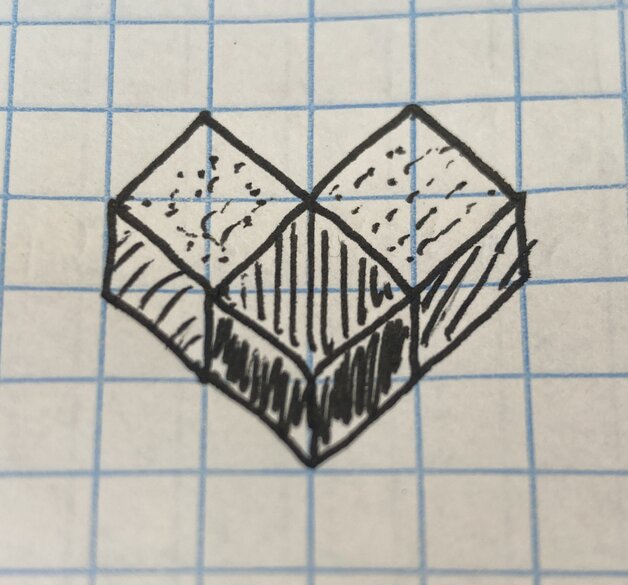
Bike Graphics Building
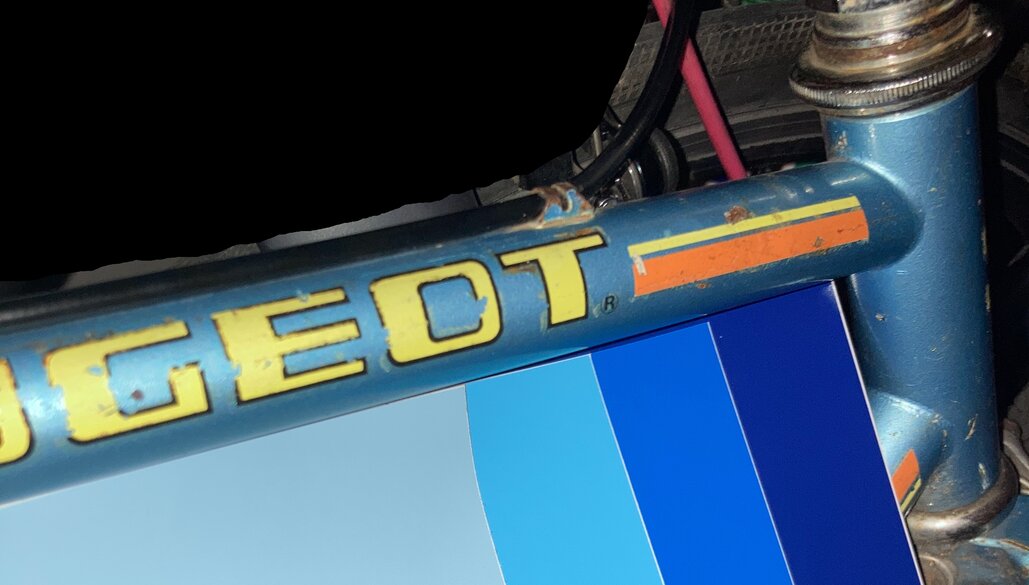
While I had the bike in the shop (for too long!) I decided to acquire some vinyl sticker material to see what I could do about recreating the sticker graphics that have been falling off the bike.
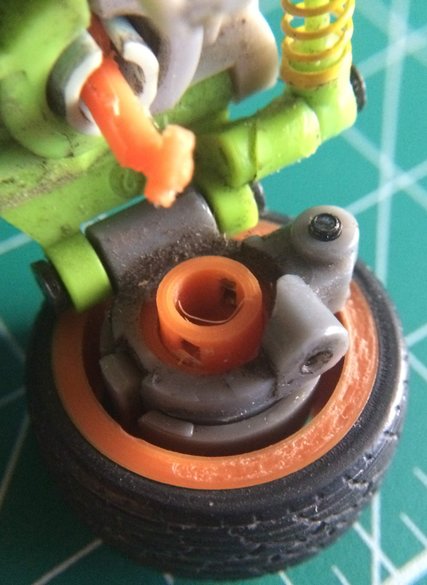
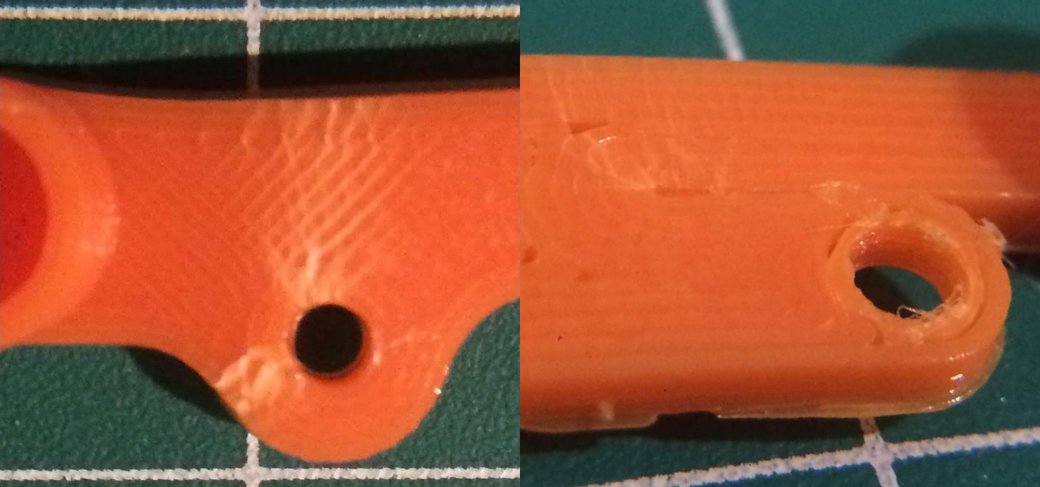
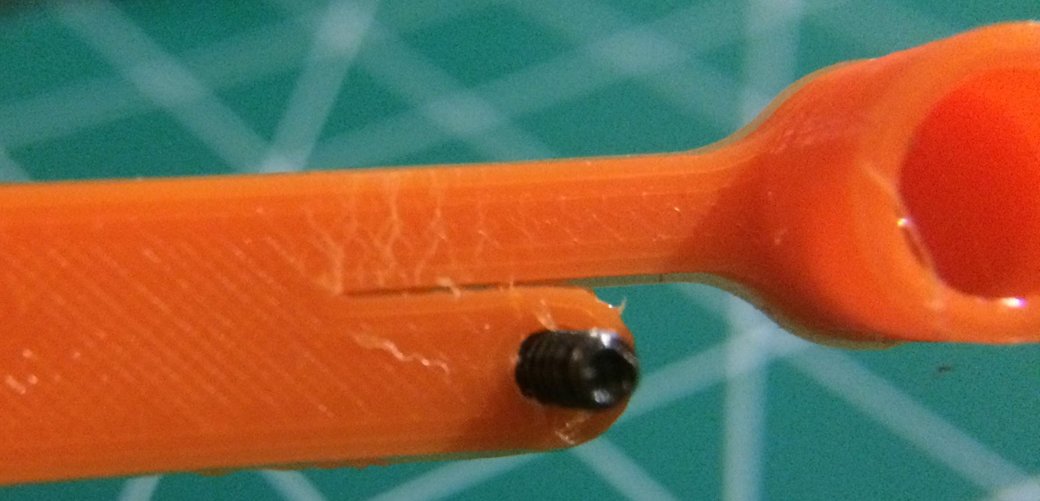
Back to Breaking: 3D Printing Edition Breaking
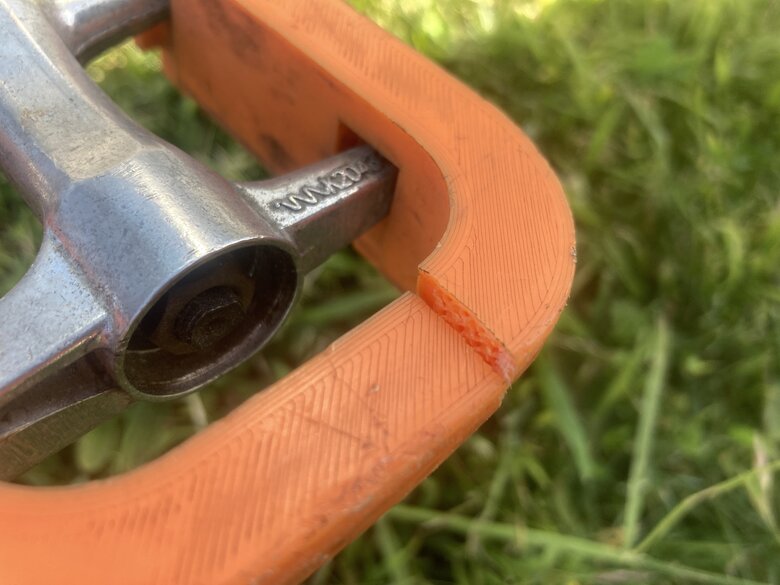
The second printed pedal finally broke. The two pieces still press fit together nicely, so it wasn't a catastrophic failure by any measure. I took some photos of the part after it happened with the intent to try and understand how it broke and how to make it stronger.
Behind the Scenes 2023-01-13 Building
The first day of the project started with a focus on getting TF-IDF set up and connecting the data to the format that scikit-learn expects. Also, a brief diversion to start with small data before going to the big data approach.
Project Concept: Supercharging Evernote Building
I'll admit it. I'm a document hoarder. For years I've been collecting and tagging notes in Evernote as I'll read through them to save for later. Can I use that hoarding to learn better?
FormaK Week in Review 2023-01-13 Building
It's been a little while since I last wrote about Formak ( FormaK Under The Hood: Optimization for scikit-learn integration , Sat 08 October 2022). Since then, I've been busy adding functionality to FormaK and I've also been improving the tooling for the project, inspired by Boring Python: code quality. The latest piece of functionality is the C++ code generation. The PR is in progress, but the initial experiments have proved out that the generation pipeline is feasible and able to be integrated into bazel.
CPU Modeling: First Order Latency and Data Dependencies Building
This post is a new episode in a miniseries focused on modeling the workings of a CPU to use for generating optimal code. This post focuses on taking a sequence of instructions and simulating their results while respecting the latency of each instruction execution and data dependencies between instructions.
SIMD and Graphs: Partitioning Graphs into data-dependency levels Building
This post is a new episode in a miniseries focused on SIMD instructions. This second post focuses on fusing common single operations across multiple data
SIMD and Graphs: Graph Matching Building
This post is a new episode in a miniseries focused on SIMD instructions. This first post focuses on matching points in the compute graph where we can combine individual instructions to form SIMD instructions.
FormaK Under The Hood: Optimization for scikit-learn integration Building
For the new scikit-learn feature, let's dive into how the model gets fit to data.
FormaK Tooling: CI Building
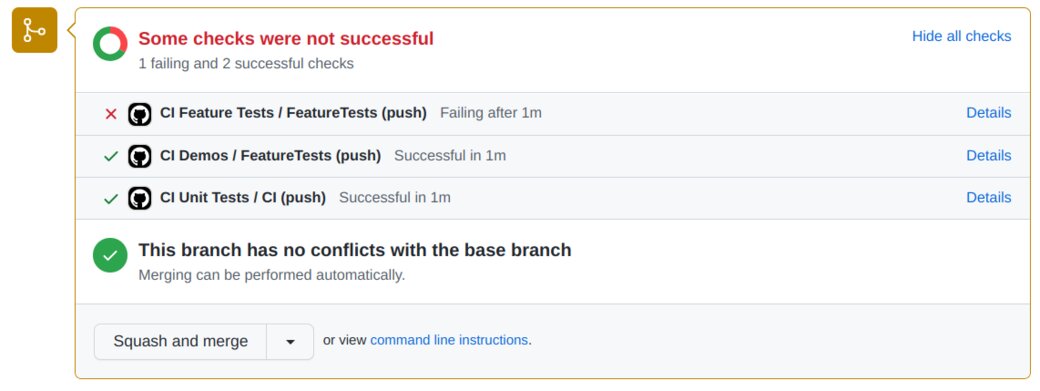
FormaK implements CI for new commits as of PR #4 via GitHub Actions
FormaK Coming Soon: Scikt-Learn Integration Building
There's a new feature coming to Formak: integration with sckit-learn. This enables quickly integrating new features such as model selection, pipelines and other data tooling.
FormaK: Python Code Generation Building
The second feature for FormaK landed: generating Python models
FormaK: User Interface Building
The first feature for FormaK landed: the user interface!
FormaK User Interface Experiment: Physical Units as Python Types Building
Using Python's type checking to check for mismatched physical quantities
I Love Bazel, I Hate Bazel Building
I love Bazel. It's one of those satisfying tools where computer science algorithms and data structures fuse with good software practice to create something that's satisfying on many levels. It knows how to minimally rebuild things. It knows how to hermetically build things in a repeatable way. I also hate Bazel.
30 for 30: Open Sourcing "FormaK" Building
Starting live development of a new open source project
random-code Day 5: Python Class Manipulation Building
Becoming a little more familiar with Python's Abstract Base Class functionality
random-code Day 4: Littering Building
How do you test a Transformer and if scoping is working?
random-code Day 3 - Testing Building
Starting testing and immediately finding some bugs
random-code Day 2 Building
Progress on a better understanding of Python while generating random code
Starting the random-code journey Building
Let's automatically construct programs for testing
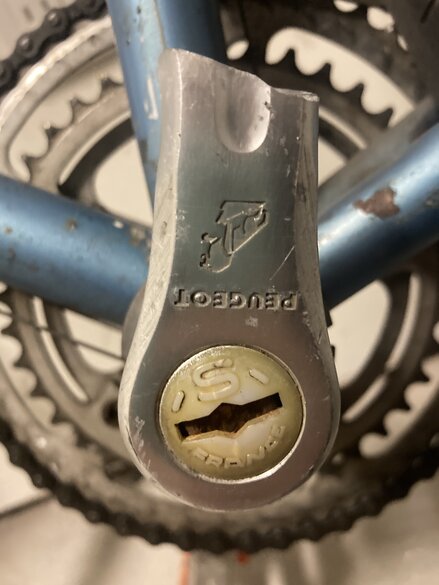
Derailed Part 2 Building
Cleaning and repairing an old Simplex Derailleur round 2 getting rid of some rust
Derailed Part 1 Building
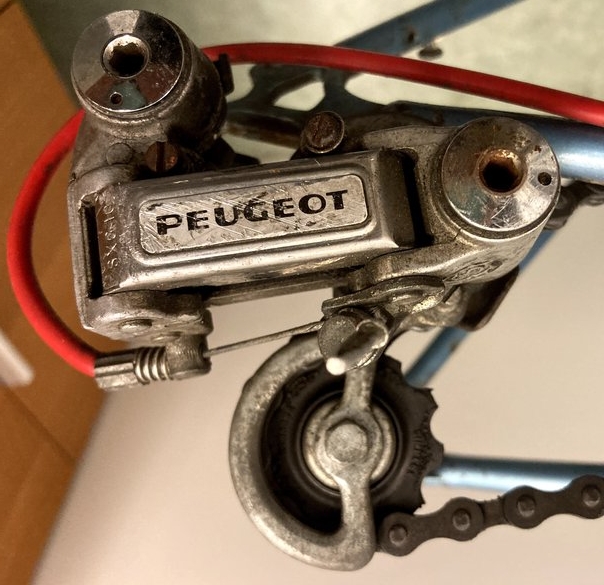
Cleaning and repairing an old Simplex Derailleur round 1: Disassembly and degreasing
The Aftermath of Breaking a Pedal Breaking
The pedal for my bike broke without warning. Let's take a look
Threads Building
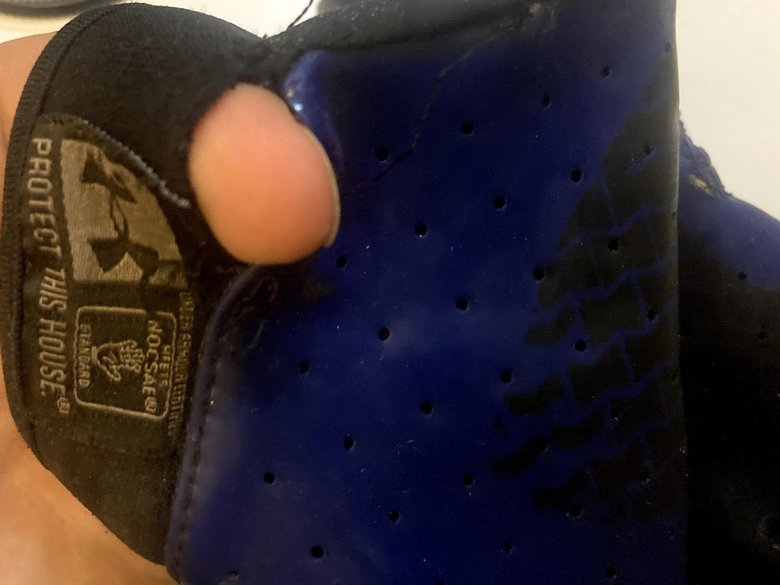
Sharing a satisfying effort to fix a hat and a glove with a little sewing
Gears and Batteries Building
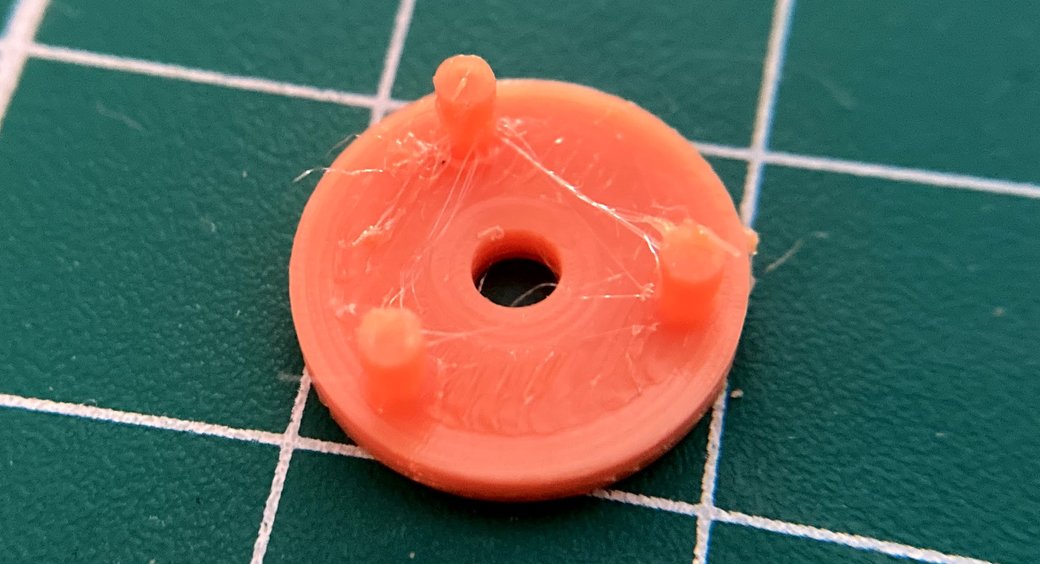
How small can we get with a functional gear part on a FDM printer? What about packing in extra batteries?
Fixing a Broken Bag Clip Building
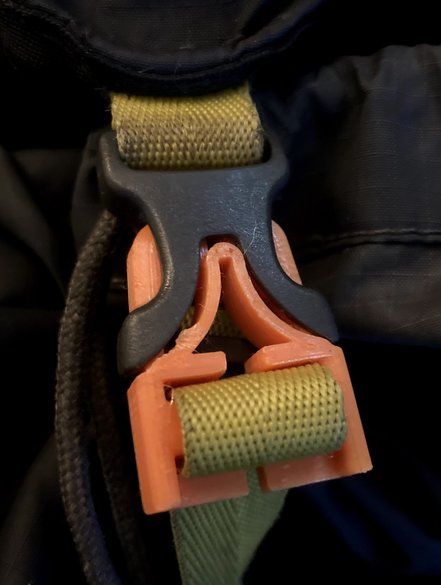
Designing and printing a replacement clip for a backpack
Working with small gears Building
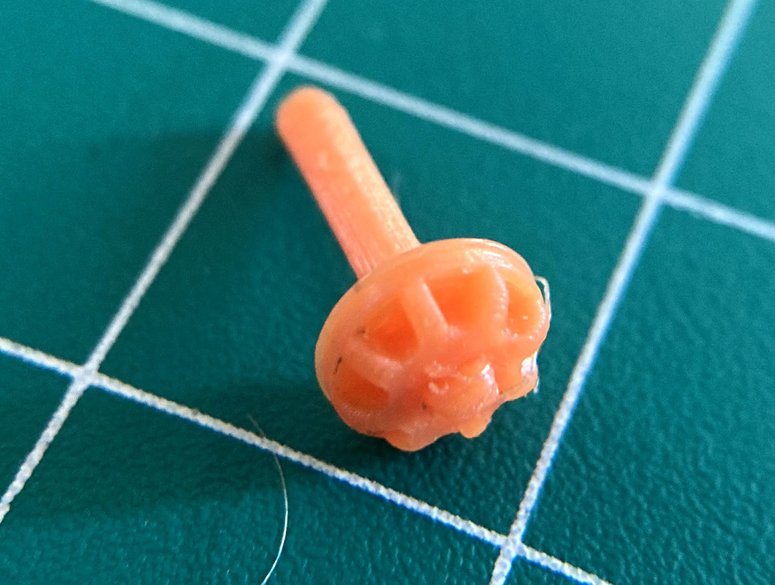
How small can we get with a functional gear part on a FDM printer?
Undoing High Impulse Disassembly Breaking
Fixing a seat support that cracked (shattered?) in a crash
Taking Notes in Jupyter Notebooks Building
Taking notes in Markdown (LaTeX?) and Python
What I'm Reading 2020-05-19 Building
Blogs, Books and Podcasts (technically listening, I know)
Restomod Day 28 Building
Two more iterations on the battery cover / side skirts
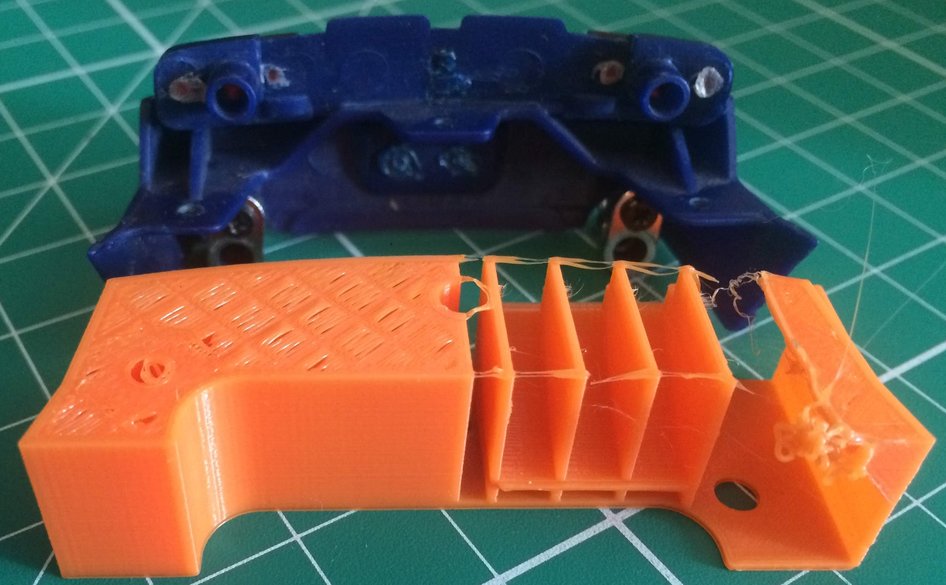
Restomod Day 27 Building
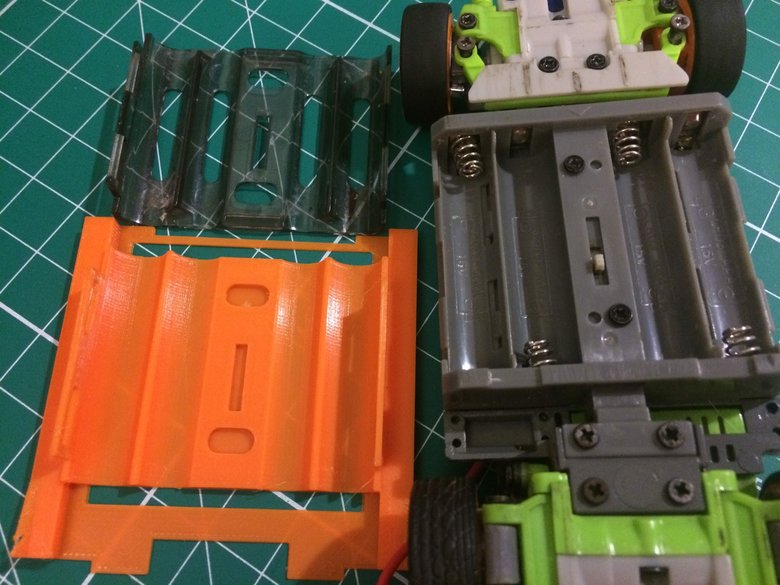
Iterating on designs for a more "aero" replacement battery cover and the rear bumper
Restomod Day 26 Building
Today was focused on quickly iterating to getting a functional rear bumper designed for extra airflow.
Restomod Day 25 Building

Today was mostly focused on how the rear bumper fits on the body
Restomod Day 24 Building
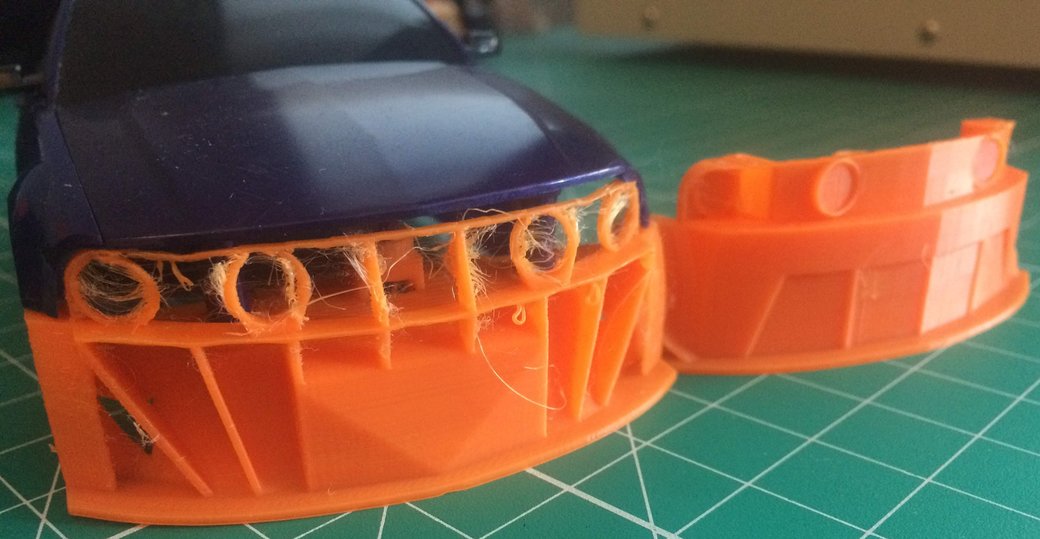
The first order of business for the day was printing the new aero front bumper. The end result was somewhat flimsy and didn't print well, but it's a great start. It's probably the least manufacturable of the part designs by traditional methods so far, making it perfect for 3D printing once the print is dialed in.
Restomod Day 23 Building
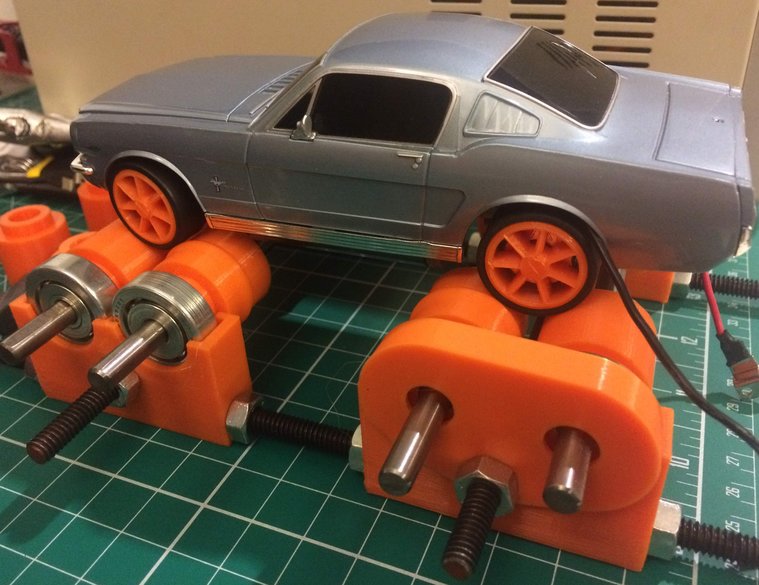
The first round of chassis dyno printing is done. During initial testing I noticed that the car did not track straight, so I added guides to some of the rollers so that the car would be encouraged to remain centered on the dyno and not roll off into the sunset when I wasn't looking. It also makes higher speed testing more boring (in a good way) where the car has less of a chance (but still a chance) to jump off the rails and drag around higher voltage cables.
Restomod Day 22 Building
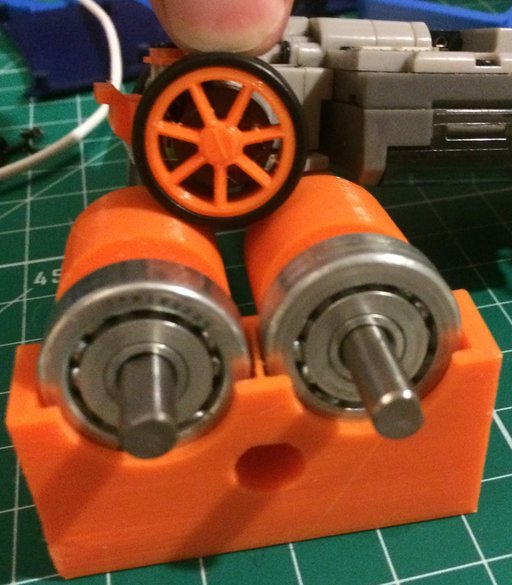
The parts for the full chassis dyno arrived. After an initial print on the rollers and the bearing housing, it looks like the design is mostly ready.
Restomod Day 21 Breaking
Today was mostly a breaking day. The printed half-shaft design melted itself apart after some high voltage testing for a couple of minutes, so it's going to need a redesign.
Restomod Day 20 Building
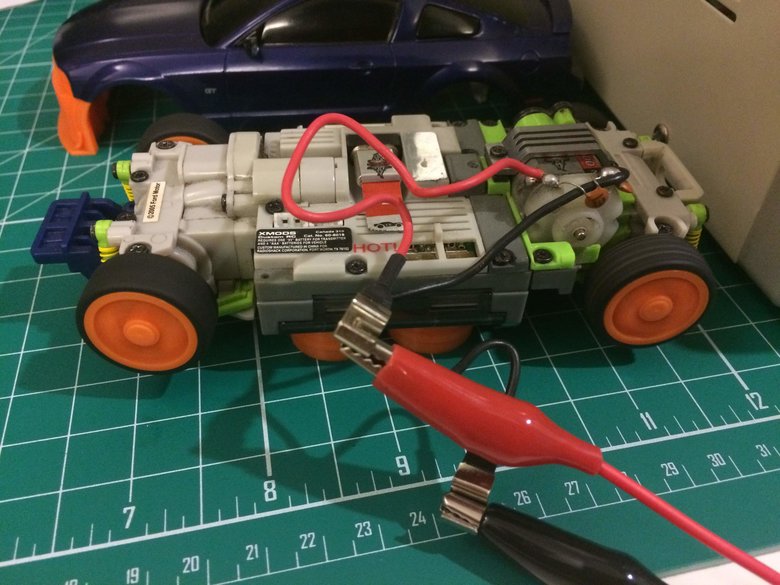
Electronics time! Today I got the bench power supply hooked up to the fully running chassis that lives under the '05 Mustang.
Restomod Day 19 Building
The suspension work continues! The rear design is now printed in a high-shell configuration. This leads to (mostly) nicely aligned filament.
Restomod Day 18 Building
The suspension work continues! The rear design with short arms plastically deformed after the first flex, so I ended up changing to a more complicated design with longer arms. The new design should also allow for equal length and thickness arms on the front and rear designs.
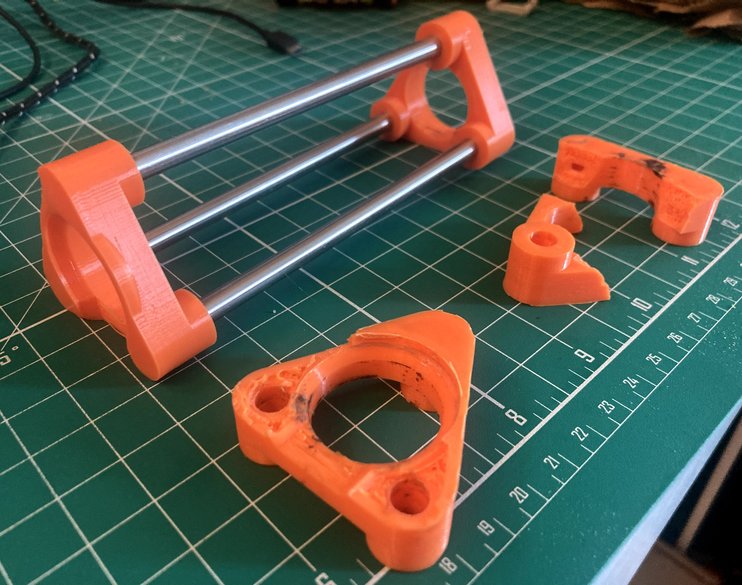
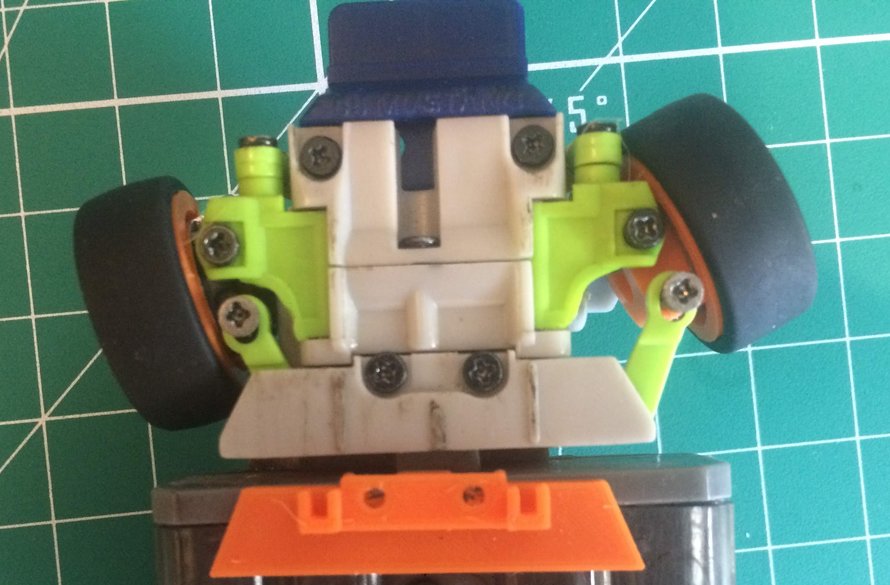
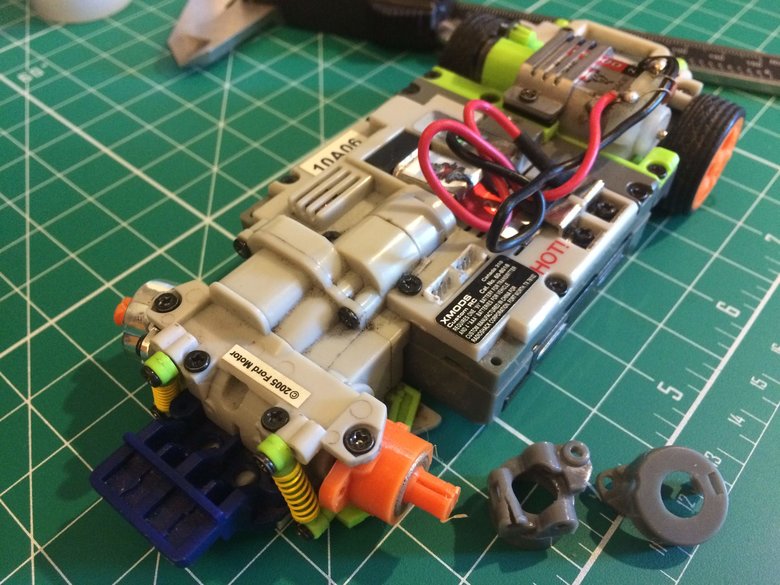
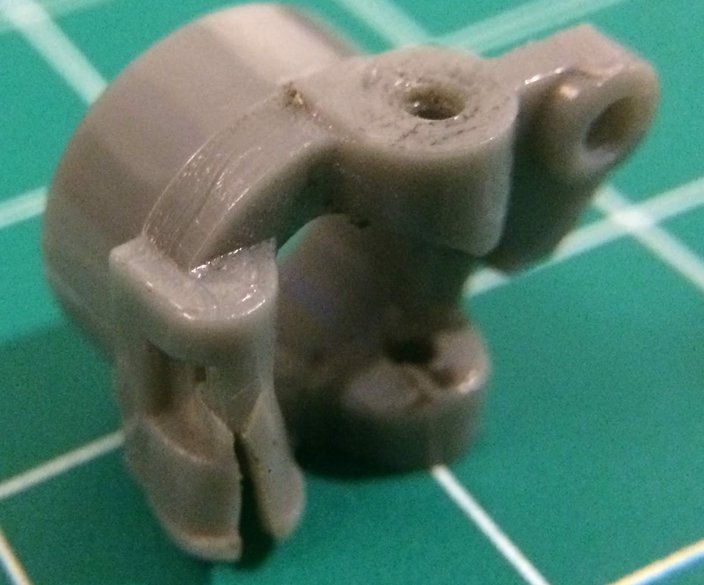
Restomod Day 17 Building
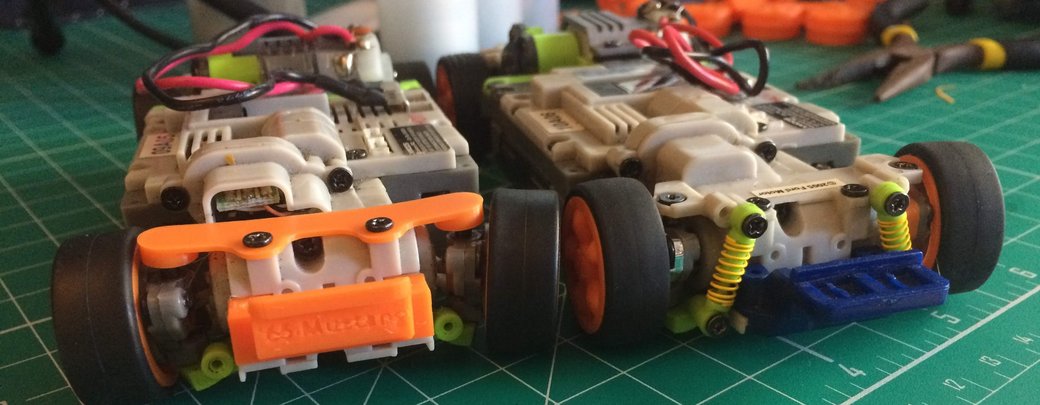
Today focused on simplifying the suspension with a printed design. There's nothing fundamentally wrong with the existing XMods suspension, but I do think there's room for improvement. For example, the existing suspension limits its own range of motion and has relatively poor ground clearance. Also, I've taken it upon myself to replace most of the front clip with printed parts now that I've gone off the deep end and printed the uprights.
Restomod Day 16 Building
Replacing the skid plate for the steering rack
Restomod Day 15 Building
Photos from Day 15: Printing a new front upright and new axles
Restomod Day 14 Breaking
Photos from Day 14: A replacement half-shaft and a broken front upright
Restomod Day 13 Building
Old Body Style, Next Generation Power and Suspension
Restomod Day 12 Building
New wheel design! Inspired by the Alfa Romeo 8C
Restomod Day 11 Building
Pictures from Day 11: Replacing the axles to enable using metal sleeve bearings
Restomod Day 10 Building
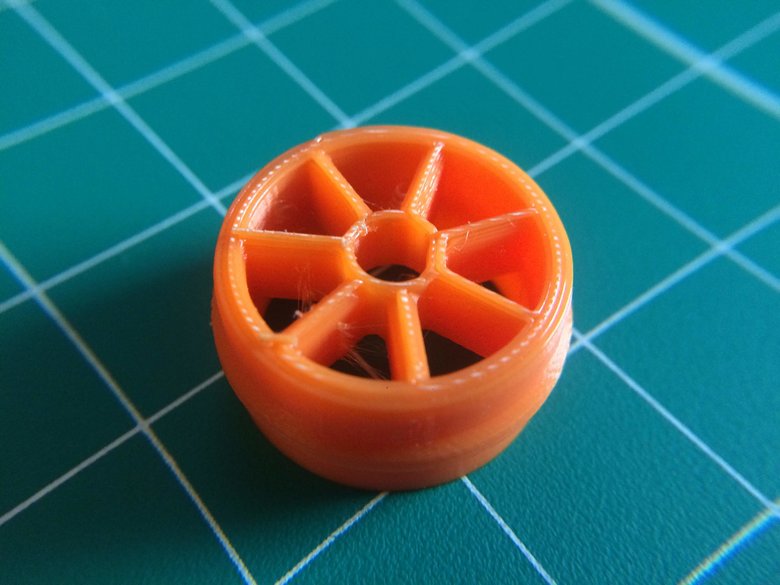
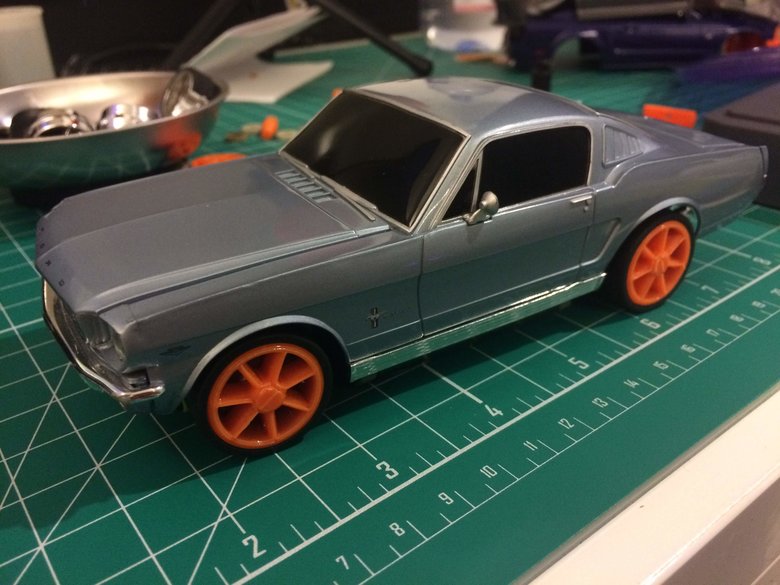
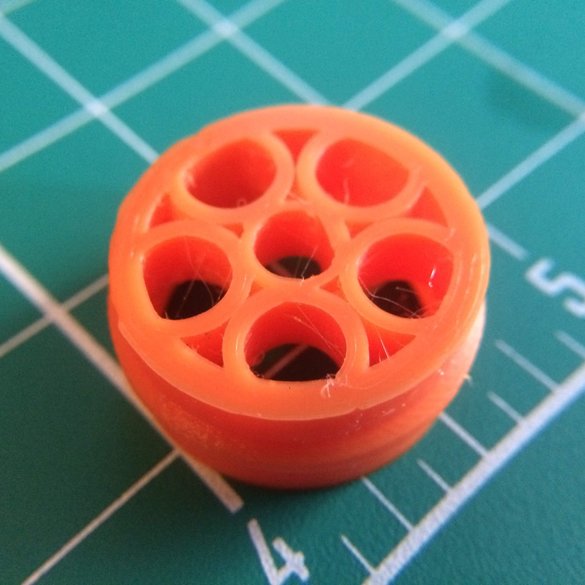
The triumph of the day was proving out the concept for creating custom wheels. The center hub uses a D-shaped drive and is sized so the wheels snap-fit into place.
Restomod Day 9 Building
Today's focus was on replacing the wheels for the XMods. This has two purposes: I've wanted to play around with printing my own wheel designs and I wanted to experiment with replacing the wheel axles to see if I could reduce slop in the wheels that comes from a loose fit between the axles and the hub.
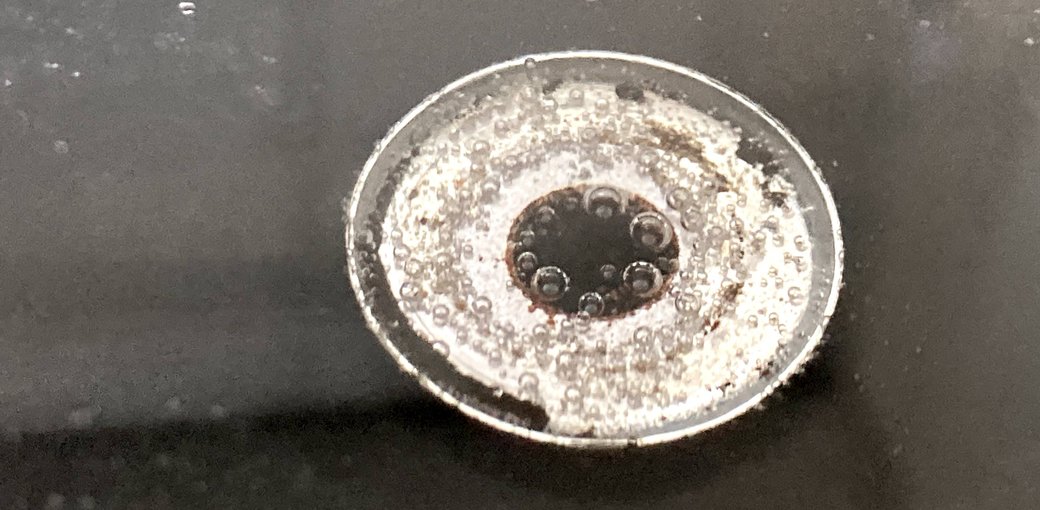
Macro Lens Shots Building
Images taken with a new macro lens
Restomod Restoration Aspirations Building
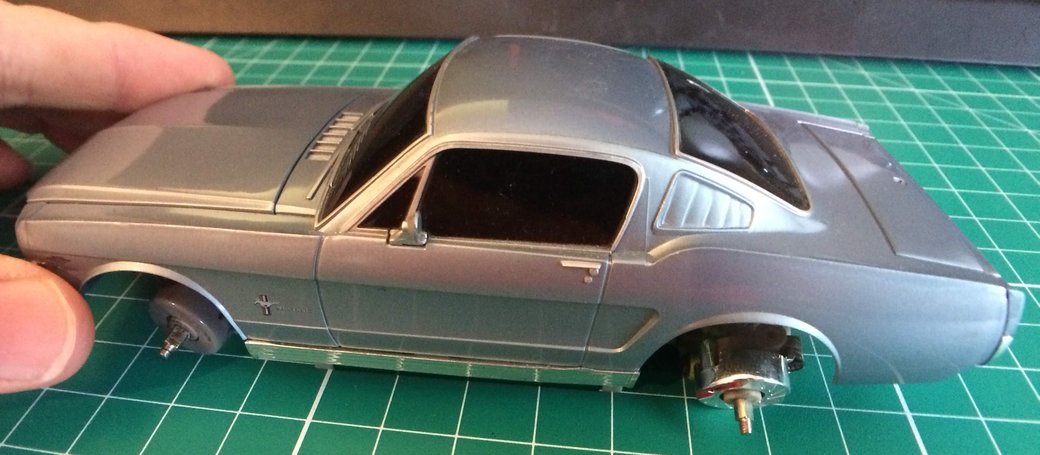
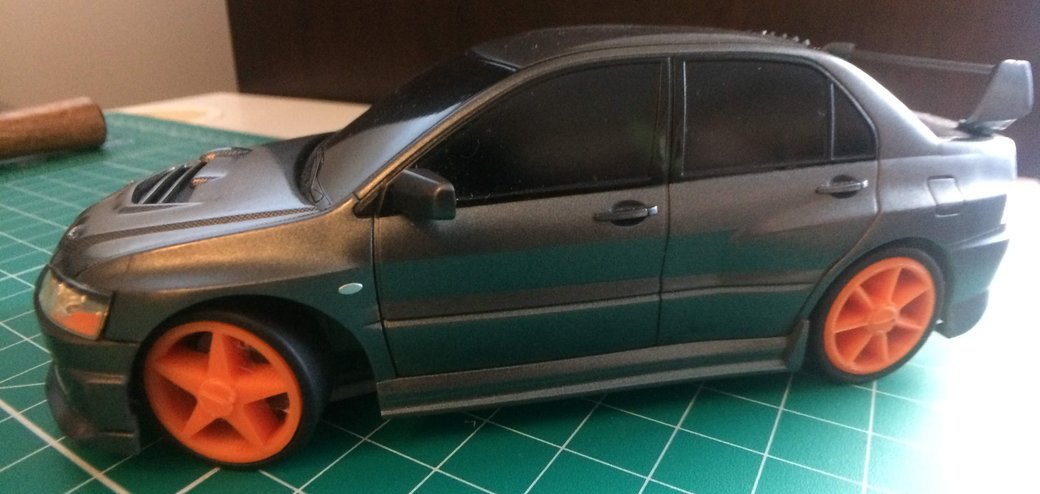
One of the more complicated restorations that I'll need to complete is reviving the older shorter chassis for the Mitsubishi Lancer Evo and the classic Ford Mustang.
Restomod Day 8 Breaking
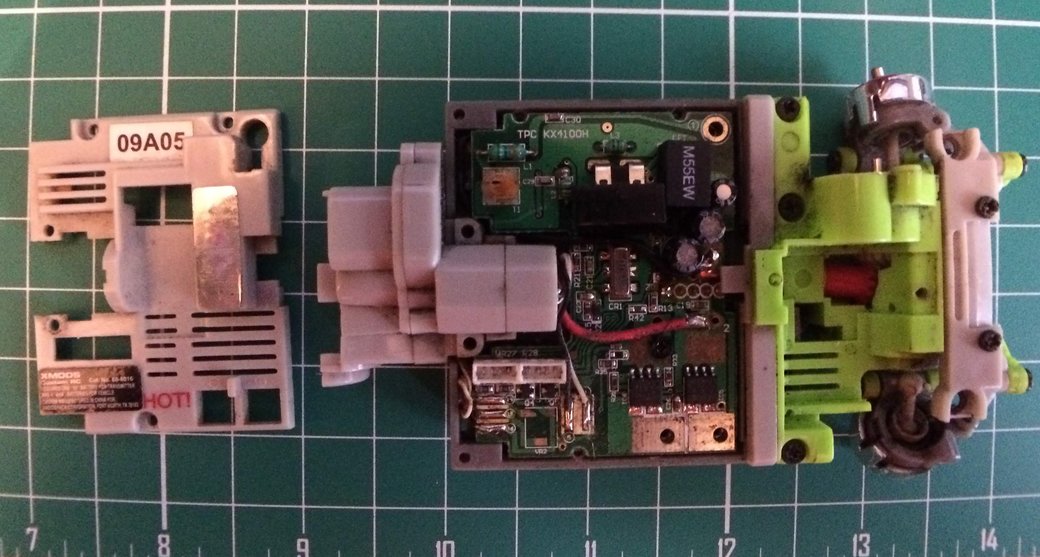
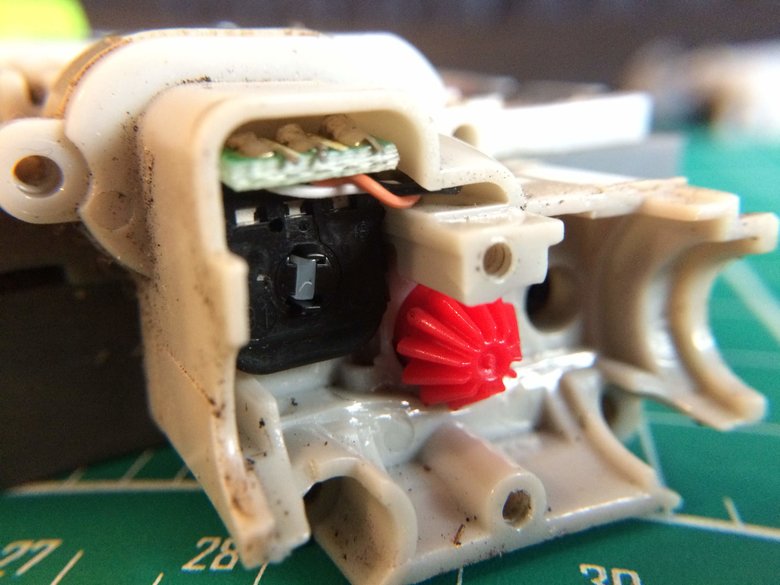
One aspect of reviving the XMods parts that I have involves figuring out what I need to fix to get the shorter chassis running again.
Restomod Day 7 Breaking
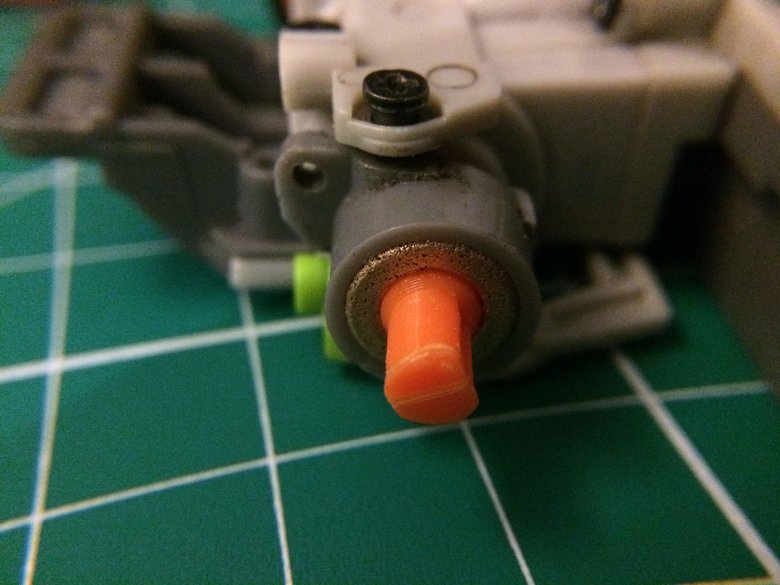
The wheel mounting design leads to some slop in the location of the wheels. In taking apart the mechanism, it appears that the slop comes from the plastic bushings not locating the driveshaft precisely.
Restomod Day 6 Building
The latest design has almost all of the features that I'm looking for, with support for some more interesting customization to go beyond the style of the original bumper.
Restomod Day 5 Building
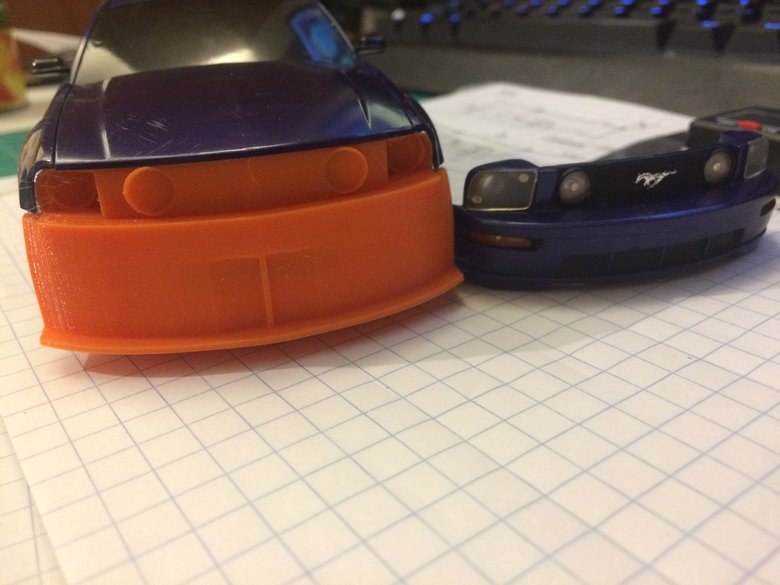
Before and after pictures, the design is almost a good fit. There are some spacing issues at the wheel well but visually the layout and the headlights are close to the original style.
Restomod Day 4 Building
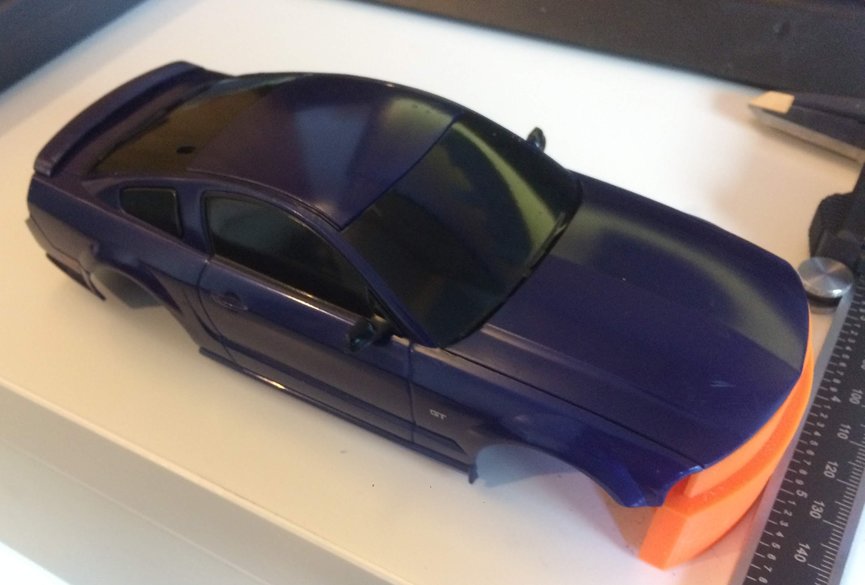
The first attempt at curvature got close, but the dimensions didn't line up with the hood as expected.
Restomod Day 3 Building
With the first prototype, I focused on getting something that would fit the 3 mounting points on the standard body.
Restomod Day 2 Building
With the first prototype, I focused on getting something that would fit the 3 mounting points on the standard body.
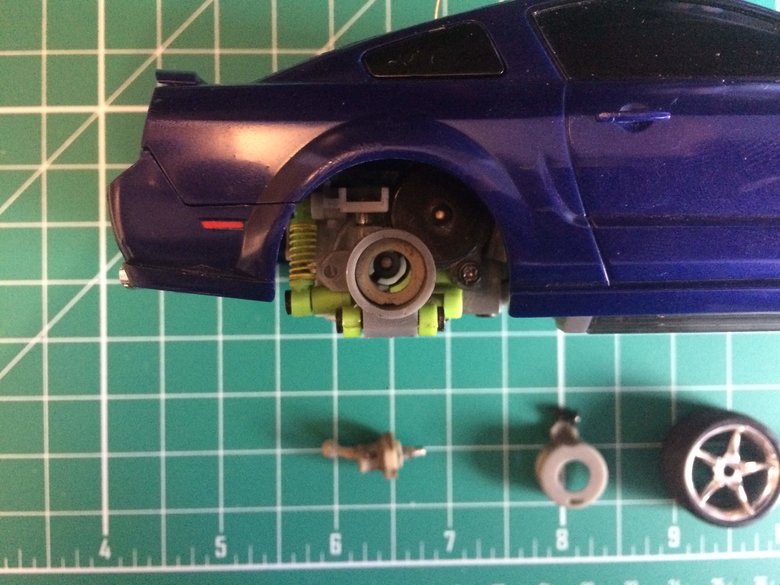
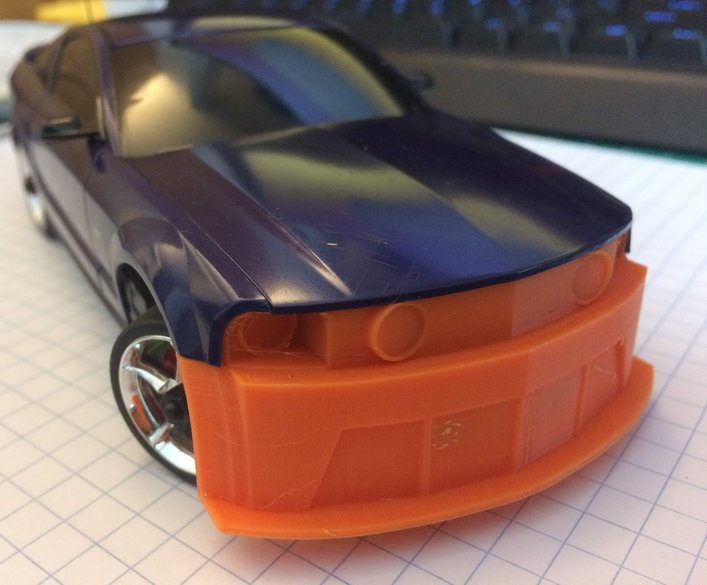
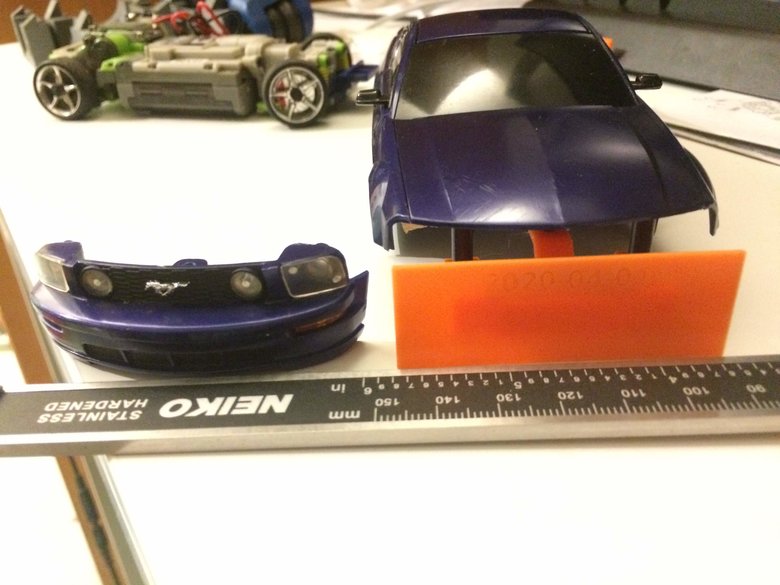
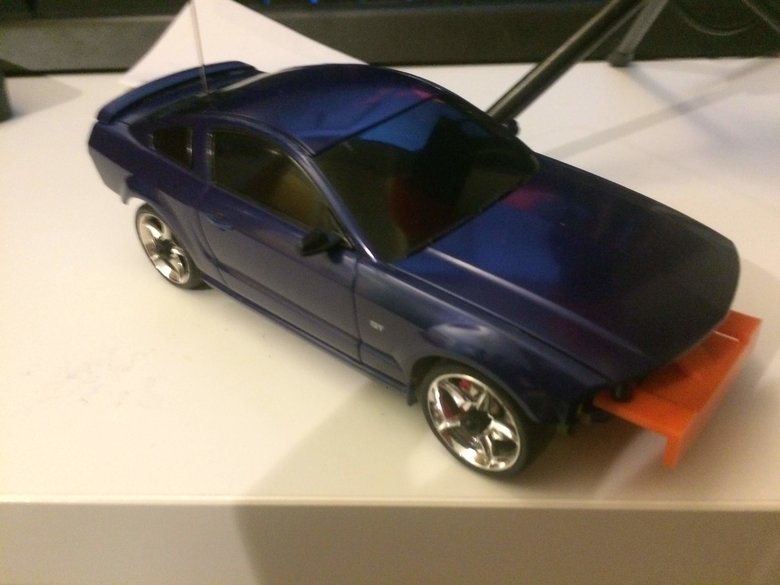
Restomod Day 1 Building
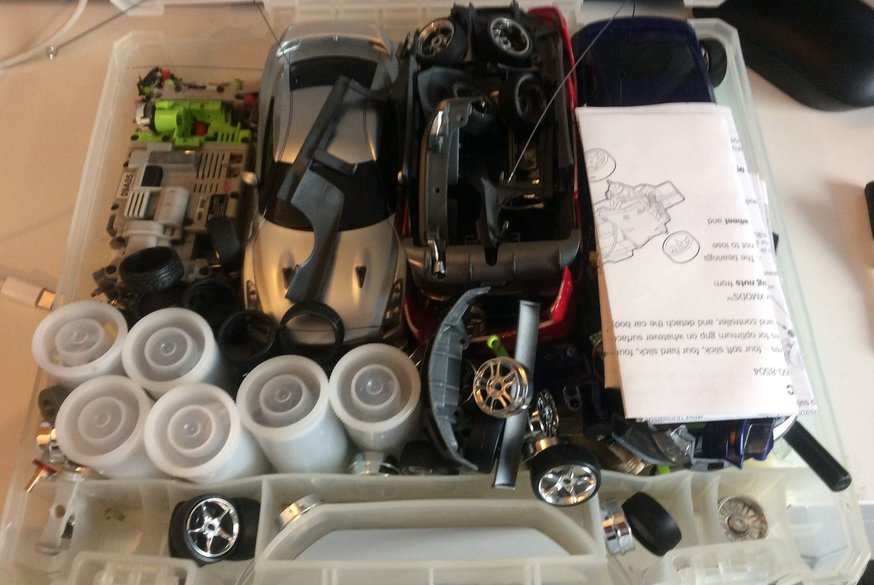
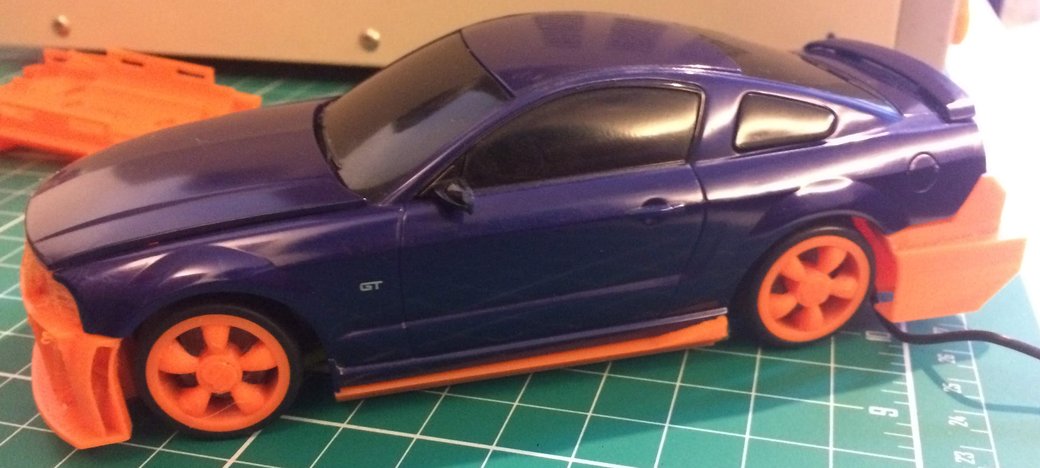
I recently dug up a box of parts for XMods, 1:28 scale RC cars with customizable chassis and bodies. Along the way I've started to document what I'm working on. The first project is going to be replacing the front bumper of the 2005 Ford Mustang.
Adding Card Support Building
What are cards? How can I automate making a nicely rendered preview for the articles I write?
Making a Website More Accessible: Part 2 Building
In this blog post, I'm going to work on bringing a nicer experience to people who use screen readers by adding ARIA landmarks and roles.
Making a Website More Accessible Building
In reading online, I've always preferred simple, fast-loading websites that are easy to read and don't get in my way from reading their content. In this blog post, I'm going to work on bringing that experience to people who use screen readers.
So You Like Data Science? Building
I think that data science is a fascinating topic, and I wanted to share some interesting things that I've found in the area.
AT Hiker Plays Firewatch: Day 2 Building
Back playing Firewatch. The game is more than just scenic views.
Tearing Down a Quadcopter: Part 4 - Reading Upside Down Breaking
I decided to go for the full-break method of investigating the electronics, and while it worked out well to start, it's looking iffy going forward.
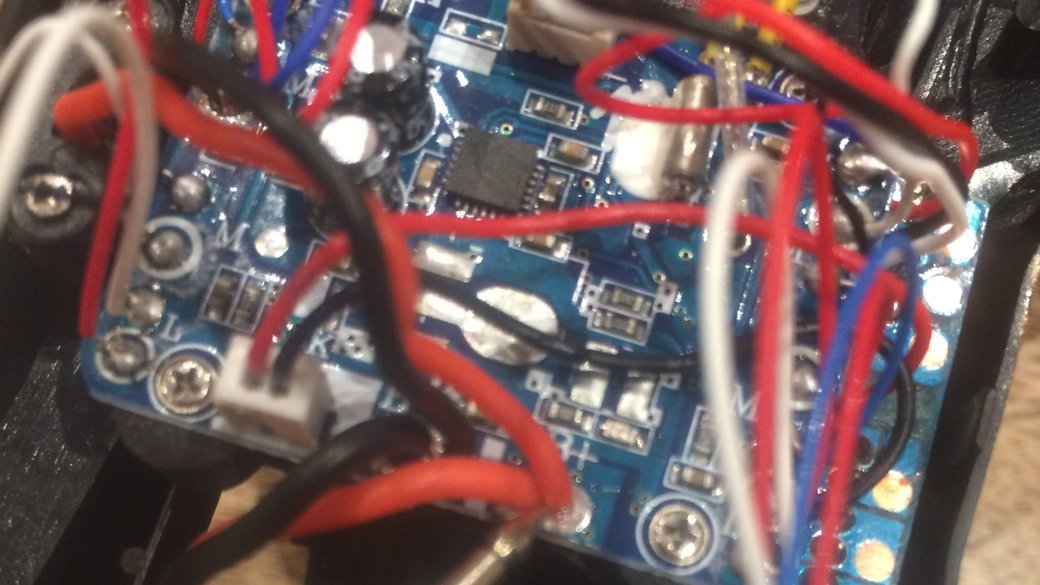
Tearing Down a Quadcopter: Part 3 - Reading a Circuit Board Breaking

My background in electrical engineering involves the first 4 chapters of an electronics textbook I read on my phone when I had internet connection and power in town while hiking the Appalachian Trail. What can I figure out about how the circuit board works for the quadcopter?
Tearing Down a Quadcopter: Part 2 - Power Systems Breaking
Mechanically, it's in shambles. What's left in the rubble? I dive into the electronics to figure it out.
AT Hiker Plays Firewatch: Day 1 Building
I've had the game Firewatch for a while, but I just started playing the game today. What makes the game particularly special to me now is that I spent last summer hiking the Appalachian Trail. Many aspects of the game bring back memories from that experience which I think is kind of amazing. This probably will spoil some of the game for you if you haven't already played. Day 1!
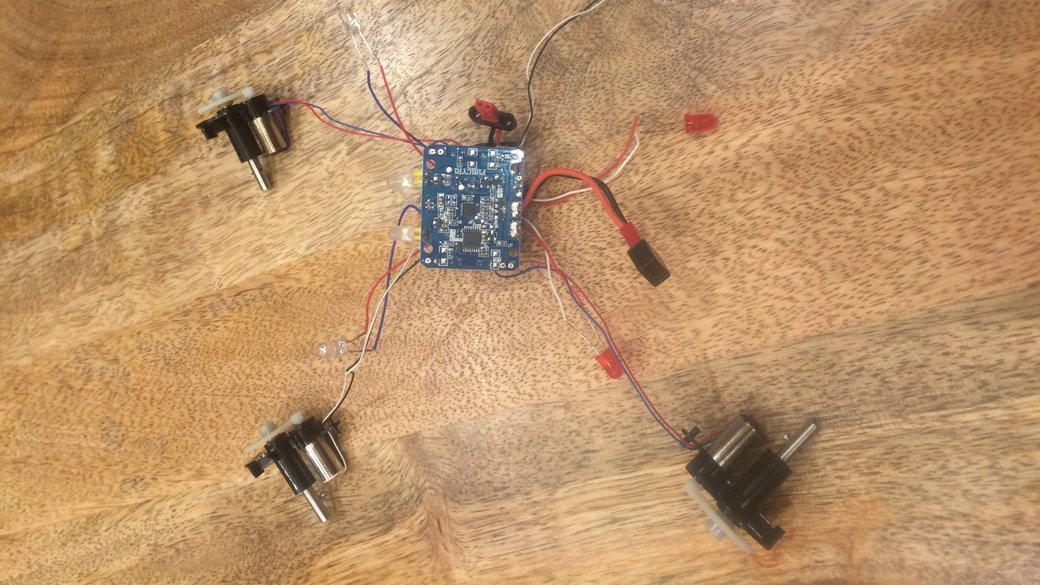
Tearing Down a Quadcopter: Part 1 Breaking
This has been a back burner project for a while; I'm now finally taking the time to take apart a quadcopter I've had for a while to see what goes into making it tick (and see if I can't mess with it a little bit too)
What's in a stepper? Breaking
For a lot of my life, the robots I worked with were pretty close to what CS wants from them: a stream of sensor data in, nicely organized in a common format across all sensors. To make things happen, I stream some outputs in another selection of formats. The sensor …